Tag: espresso
How to install Espresso and Cucumber in Android Studio
You can download a sample project that is already configured and try first: https://github.com/cucumber/cucumber-jvm/tree/master/examples/android/android-studio/Cukeulator
- The structure of your project should be like this:
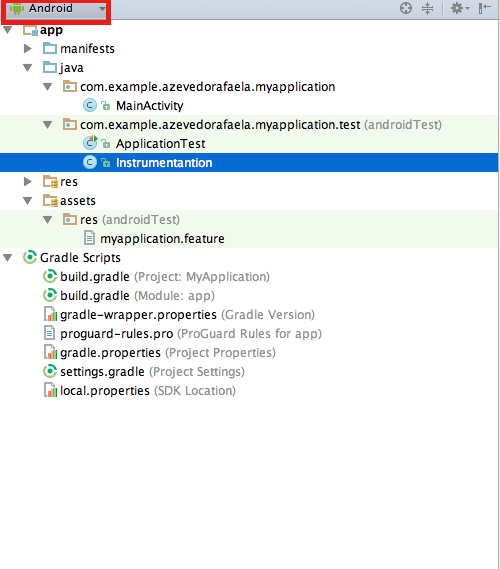
On Android View:
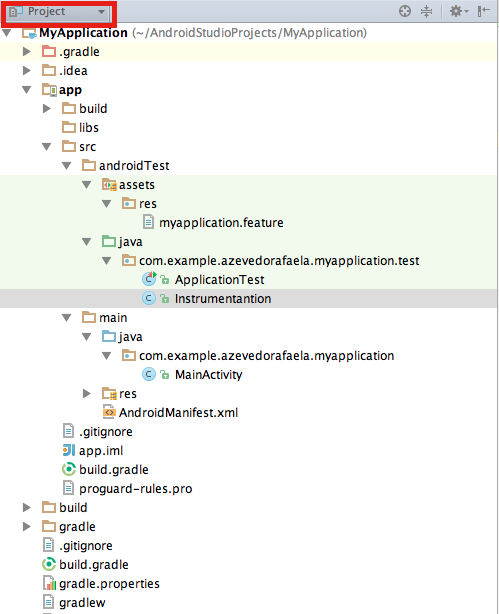
On Project View:
- Now, open the build.gradle of your app and write these dependencies:
dependencies {
 androidTestCompile 'com.android.support.test.espresso:espresso-core:2.2'
 androidTestCompile 'com.android.support.test:testing-support-lib:0.1'
 androidTestCompile 'info.cukes:cucumber-android:1.2.4'
 androidTestCompile 'info.cukes:cucumber-picocontainer:1.2.4'
}
- I had some problems with the version of java, if you have the same problem just update your java or downgrade/upgrade the version of the plugin which is incompatible.
- In your build.gradle you will need to write more these configs. Change the name of your application and the package of the runner, following the structure of your project and sync your build.gradle file.
android {
 defaultConfig {
 testApplicationId "com.example.azevedorafaela.myapplication"
 testInstrumentationRunner "com.example.azevedorafaela.myapplication.test.
Instrumentation"
 }
   sourceSets {
     androidTest {
        assets.srcDirs = ['src/androidTest/assets']
     }
   }
}
- In your Feature file you an write your scenario like this:
Feature: Test

Scenario: Espresso with cucumber test
Given I have my app configured
When something happens
Then I should see xx on the display
- In your Instrumentation class:
package com.example.azevedorafaela.myapplication.test;
import android.os.Bundle;
import android.support.test.runner.MonitoringInstrumentation;
import cucumber.api.android.CucumberInstrumentationCore;
public class Instrumentation extends MonitoringInstrumentation {
private final CucumberInstrumentationCore instrumentationCore = new
CucumberInstrumentationCore(this);
@Override
 public void onCreate(final Bundle bundle) {
 super.onCreate(bundle);
 instrumentationCore.create(bundle);
 start();
 }
@Override
 public void onStart() {
 waitForIdleSync();
 instrumentationCore.start();
 }
}
- In your Steps file:
package com.example.azevedorafaela.myapplication.test;

import android.test.ActivityInstrumentationTestCase2;

import com.example.azevedorafaela.myapplication.MainActivity;

import cucumber.api.CucumberOptions;
import cucumber.api.java.en.Given;
import cucumber.api.java.en.Then;
import cucumber.api.java.en.When;
import com.example.azevedorafaela.myapplication.R;
import static android.support.test.espresso.Espresso.onView;
import static android.support.test.espresso.action.ViewActions.click;
import static android.support.test.espresso.assertion.ViewAssertions.
matches;
import static android.support.test.espresso.matcher.ViewMatchers.withId;
import static android.support.test.espresso.matcher.ViewMatchers.withText;

@CucumberOptions(features = "features")
public class MainActivitySteps extends ActivityInstrumentationTestCase2
<MainActivity> {

    public MainActivitySteps(){
        super(MainActivity.class);
        assertNotNull(getActivity());
    }

    @Given("^I have my app configured$")
    public void I_have_my_app_configured() {
    }

    @When("^something happens$")
    public void something_happens(final char op) {

    }

    @Then("^I should see xx on the display$")
    public void I_should_see_xx_on_the_display(final String s) {
    }
}
Now you can start write your espresso code inside of each step. To run your test you need to:
- In your terminal, open your project folder and run:
gradle --parallel :app:assembleDebugTest
- Now you need istall the apk in your device/simulator:
adb install -r app/build/outputs/apk/app-debug.apk
- Check if your app is installed. Should display the instrumentation of your app
adb shell pm list instrumentation
- To run the tests with gradle:
gradle connectedCheck- To run the tests with adb:
adb shell am instrument -w com.example.azevedorafaela.myapp
lication/com.example.azevedorafaela.myapplication.test.Instrum
entation
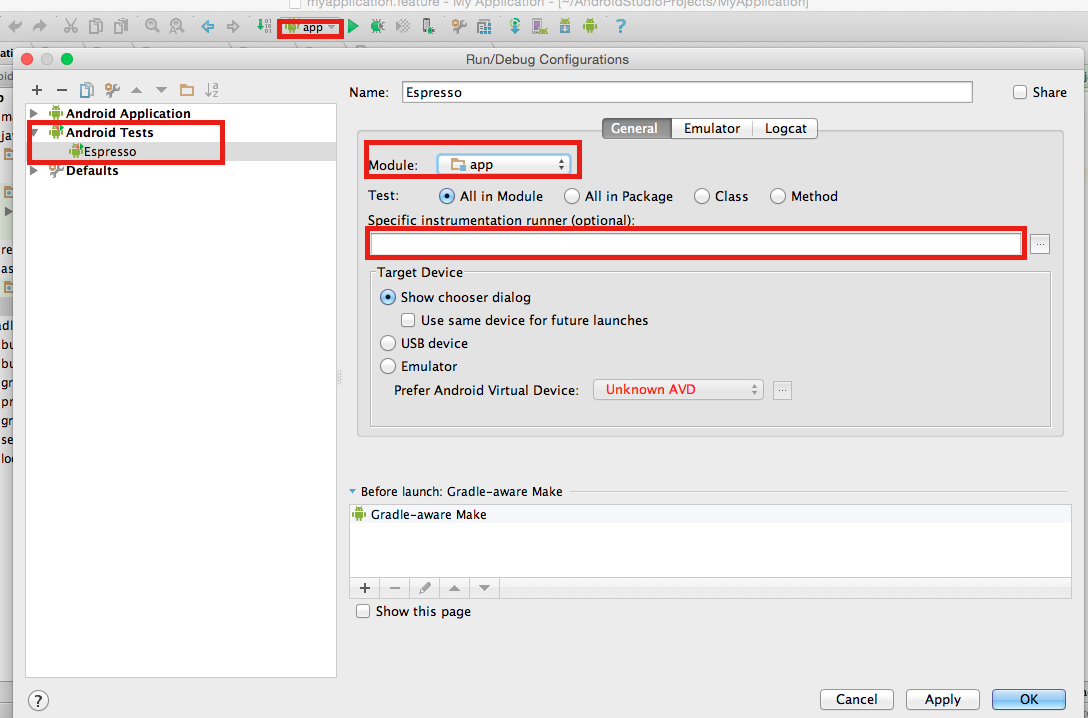
- To run your tests via android configurations:
- Open your run configurations
- Create an androidTests
- Give a name to this config
- Select your module
- Don’t write anything on the instrumentation field. (We already configured this in our build.gradle)
- Ok.
Now you can run your cucumber with espresso tests. I hope this “tutorial” helps you as helped me to install everything on my project.
Thank you guys ! See you next week 🙂
