Appium, how to install and inspect elements on Android ?

  • Install brew:
    ruby -e "$(curl -fsSL https://raw.githubusercontent.com/Homebrew/
    install/master/install)"


  • Install Node.js: brew install node


  • Install XCode


  • Install XCode Command line
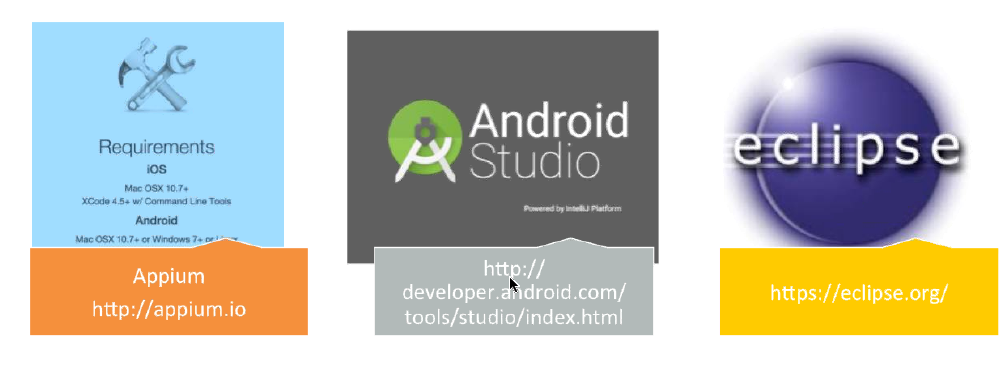
 

  • Install appium. app


  • Install android jdk


  • Install java


  • Export $HOME


  • Export $JAVA_HOME – If you are using Mac, your java will be at: /Library/Java/JavaVirtualMachines/jdkx.x.x.jdk/Contents/Home


  • Export $ANDROID_HOME – If you have android studio (and on Mac), your jdk will be point to /Library/Android/sdk


  • Export $PATH: $PATH:$ANDROID_HOME/tools:$ANDROID_HOME/platform-tools


  • Create an emulator with adb


Be sure you have an android emulator created, I normally use genymotion.


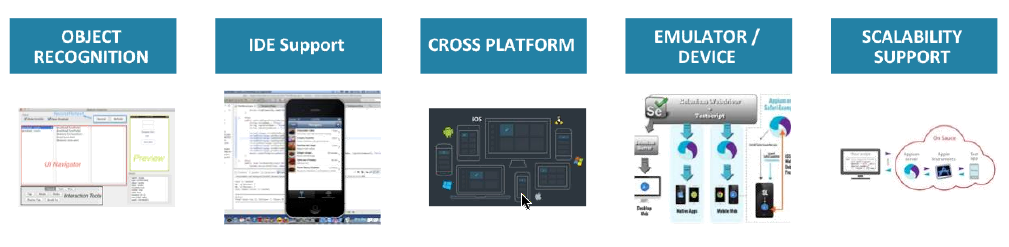
Inspect this app with appium


screen-shot-2016-09-24-at-13-04-41


  • Run Appium Doctor and be sure everything is setup:

screen-shot-2016-09-24-at-13-15-01

  • Click on General Settings button and fill the form like this example:

screen-shot-2016-09-24-at-13-04-55

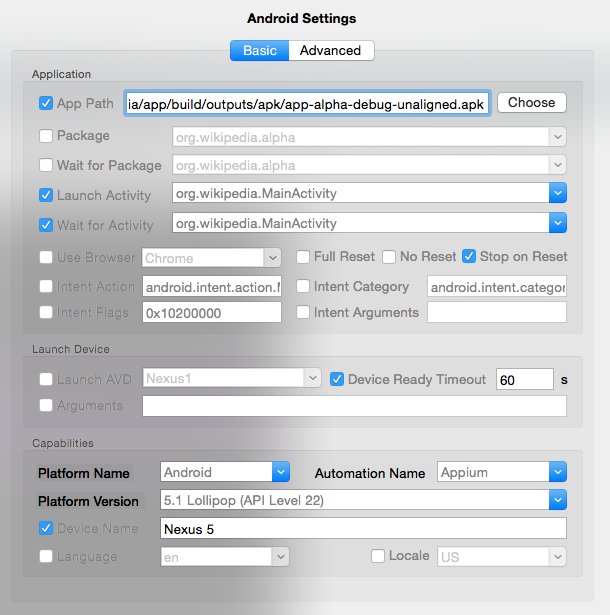
  • Click on Android Settings buttons and fill the form like this example:


screen-shot-2016-09-24-at-13-04-26

  • Open the emulator with adb or genymotion and click to Launch:

screen-shot-2016-09-24-at-13-23-20

  • After this you can click on Inspector button, which will open the app and let you inspect the elements

screen-shot-2016-09-24-at-13-22-40


Easy peasy 🙂

Thank you guys, see you next weekend !

Pros and Cons of Robotium

Hi guys, I am writing just a summary about Robotium, because maybe I will start to work with it. So, if you have any tips or suggestion, please feel free to comment here.

Robotium is a popular Android automation framework for testing native and hybrid Android apps using the black box method. Licensed under an Apache 2.0 license and first released in 2010.

To use Robotium, you need either the source code or apk file for the app, Eclipse for building a test project, ADT (Android Development Tools), SDK (Software Development Kit), JDK (Java Development Kit), and the Robotium.jar file.

Benefits:
• You can develop powerful test cases, with minimal knowledge of the application under test.
• Allows user to test more flexible and convenient for analyzing results.
• Robotium allows us to take screenshots anywhere in the test (both for Emulator and Device) and save it to device internal memory or SD Card or Emulator
• The framework handles multiple Android activities automatically.
• Minimal time needed to write solid test cases.
• Readability of test cases is greatly improved, compared to standard instrumentation tests.
• Test cases are more robust due to the run-time binding to GUI components.
• Blazing fast test case execution.
• Automatic timing and delays.

Limitations of Robotium:
• Tied to JUnit 3 Instrumentation on device.
• Tied to one app process.
• It can’t work with different Applications in on test – if your application call another one (like Camera) – Robotium can’t “see” it and press any buttons there.

Parallel tests:

I’ve found this API: https://github.com/square/spoon, but I believe that we can configure parallel tests with Jenkins too.


Thank you guys ! See you next week 🙂


Sources:

https://saucelabs.com/resources/articles/open-source-tools-robotium-android-appium

https://code.google.com/p/robotium/

https://www.linkedin.com/grp/post/3769150-5852687643892002817

http://blog.mobinius.com/robotium-best-testing-framework-for-android/

Getting Started with Mobile Test Automation & Appium

Hi guys, today I have another Webinar that I participate about Appium, how to choose the automation mobile tool, how should be the structure, etc. You can watch online or download, just click in this link to start.

You can jump the advertisement moving to 00:10:51 of the video. Also, you can jump to 00:23:12 and watch the demo. To jump the demo go to 00:40:00.


Difference between hybrid native and html


Screen Shot 2015-05-27 at 20.39.45


HTML: web applications which runs in web browser.

Native: just native elements, apps which doesn’t have html elements.

Hybrid: mix of native elements and html elements.


Mobile QA Solutions


Screen Shot 2015-05-27 at 20.44.35

– How choose the automation tool ?

– Verify how you inspect the elements.

– Scalability, How many devices supports (IOS, windows phone, tablet, kindle, ipad, etc).

Integration with other tools like Jenkins, JIRA, etc.

Cloud, If this tool supports cloud tests (Amazon cloud, Sauce Labs, etc).

Automation Support, How long do you take to find the solution for some problem ? (Particularly, this is the most important for me )


Appium

Open source automation test automation framework for native, hybrid and mobile apps.


Supports:
Real devices, Simulators, Native Apps, Hybrid Apps, Mobile Web Apps (IOS and Android only).

Environment: Appium, Android Studio (Sdks) and Eclipse.

Screen Shot 2015-05-27 at 20.47.56

Setting parameters: App device, launch device, android setting (path of sdks).


Screen Shot 2015-05-27 at 20.49.03

Architecture, Blueprint: 

Screen Shot 2015-05-27 at 20.46.16

Screen Shot 2015-05-27 at 20.50.50

Make sure that you are doing right


Screen Shot 2015-05-27 at 21.14.19

– Do some proof of concepts (The configuration it is the hard and most boring part for me).

– Share the right quantity of tests between emulators and devices.

– Distribute the right level of tests between unit (70%), integration (20%) and manual tests (10%).

– Remember that if you are using BDD, it is just 3 layers.

– Use CI since the beginning.

– Decide what must to have in the report.

– Considerate the language which the developers are using (You never know when you will need help).

Screen Shot 2015-05-27 at 21.18.30

Thank you guys ! See you next week 🙂

Source: link

How to install SafariLauncher to run appium ?

Hi guys,

I am going to write about “How you can install the framework of safari to run appium tests”. If you need run tests in safari of real devices with Appium, you can use this framework for ios devices (Android it is more easier as always). So, you need to have an apple developer account.

-> Plug your device

-> Git clone this project: https://github.com/budhash/SafariLauncher

-> Add your device in your developer apple register.

https://developer.apple.com/account/ios/device/deviceList.action

-> Download your certificate and your mobile provisioning profile after

https://developer.apple.com/account/ios/certificate/certificateList.action

&

https://developer.apple.com/account/ios/profile/profileList.action

-> Install your mobile provision in your device (or double touch on the file)

-> Put in blundle id com.safariLauncher.safariLauncher -> inside of the general properties of the project

-> Check if you are deploying in the right version of ios.

-> Run the project

-> Don’t forget to set the capabilities in your automation project:

DesiredCapabilities capabilities = new DesiredCapabilities();
capabilities.setCapability("appium-version", "1.3.1");
capabilities.setCapability("platformName", "iOS");
capabilities.setCapability("deviceName", "Tahir's iPhone");
capabilities.setCapability("udid", "your_udid");
capabilities.setCapability("bundleId", bundle);
capabilities.setCapability("browserName", "safari");
driver = new AppiumDriver(new URL("http://127.0.0.1:4723/wd/hub"), capabilities);    

driver.get("http://www.google.com");
Thread.sleep(20000);

Once you have deployed the safari launcher to the device, everything should be configured correctly so that the next time you run ./reset.sh on appium, the installation of the safari launcher app should succeed.

See you next week !