Load tests: Jmeter vs K6

Hello all,

Today it’s the turn of Jmeter and K6 ! As always, remember to check your other options and see what better fits for your project.

Jmeter is a great and powerful tool, but depending on what you really need (something more lighter) then Jmeter might become an over complex, slow, hard to maintain tool.

Jmeter K6
In-built Protocols Support
  • HTTP
  • FTP
  • JDBC
  • SOAP
  • LDAP
  • TCP
  • JMS
  • SMTP
  • POP3
  • IMAP
  • HTTP 1.1
  • HTTP 2
  • WebSockets
Speed to write tests
  • Slow
  • Fast
Support of β€œTest as Code”
  • GUI oriented
  • Possibility to create scripts, but too complex and lack of documentation
  • Weak (Java)
  • Hard to maintain
  • Scripts oriented
  • JavaScript
  • Easier to maintain
Ramp-up Flexibility
  • Plugins available to be able to configure flexible load
  • Supports ramp-up phases and flexible load
Test Results Analyzing
  • Yes
  • Yes
Resources Consumption
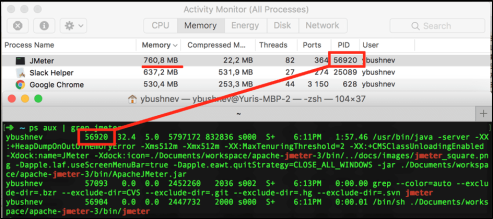
  • Heavy to run tests with multiple users on a single machine, more memory consumption
  • Lightweight and doesn’t take up so much memory of your machine

Screenshot 2020-07-06 at 23.34.47

Easy to use with Version Control Systems
  • No
  • Yes
Number of Concurrent Users
  • Thousands, under restrictions
  • Thousands
Recording Functionality
  • Yes
  • No, but it allows to auto-generate a k6 script via an HAR file
Distributed Execution
  • Yes
  • Yes
Load Tests Monitoring
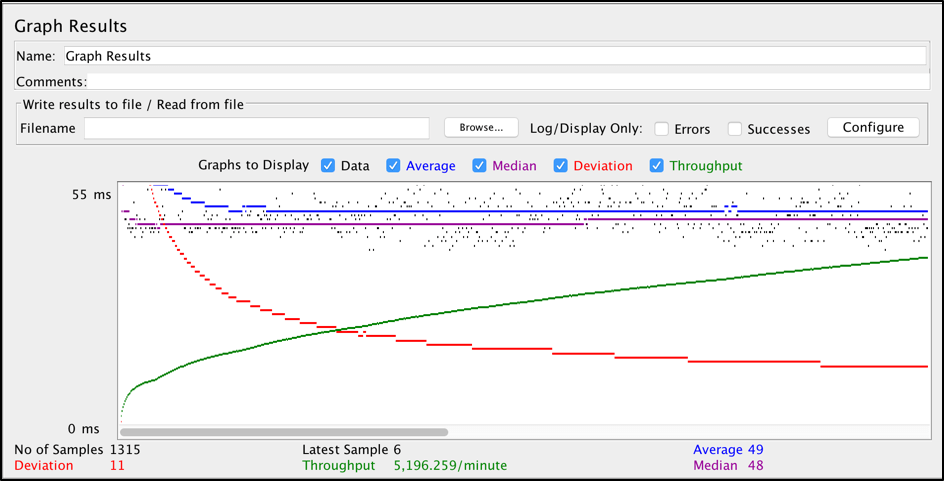
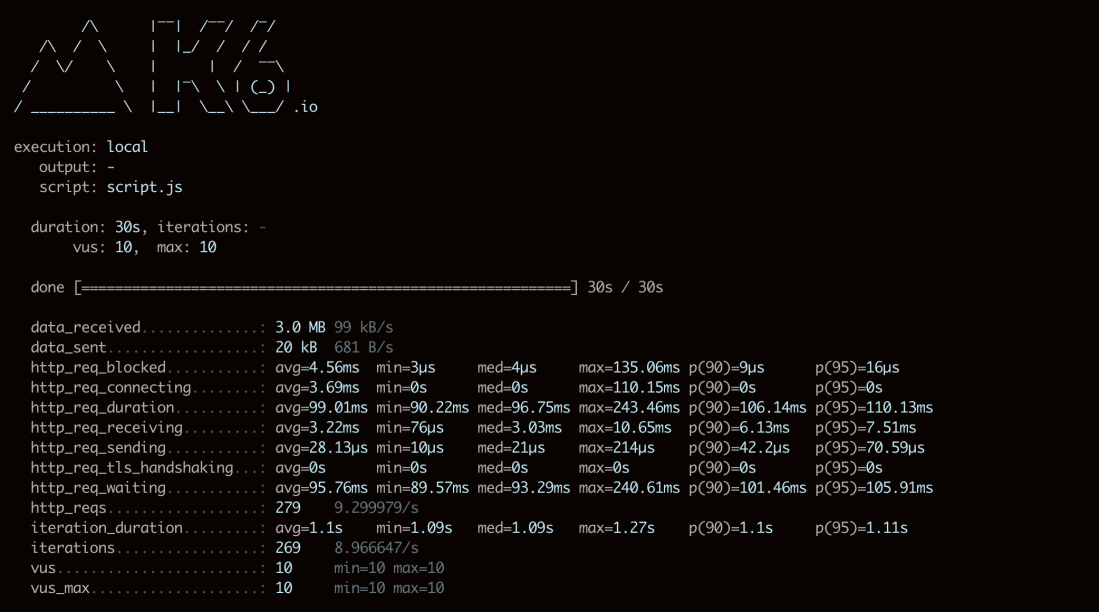
  • Add listeners, but consume more memory

Screenshot 2020-07-06 at 23.35.02

Jmeter is most used when:

  • You need to perform a complex load including different protocols
  • You can record scenarios
  • Robust support and training ecosystem
  • Require that a full scenario be written for every test
  • If you need to simulate specific load with some custom ramp-up patterns
  • If you just prefer UI desktop app for scripts creation, or you just do not know Javascript/YAML/JSON well enough


K6 solves some specific problems:

  • CLI tool with developer-friendly APIs.
  • You can use HAR files to generate record sessions
  • Checks and Thresholds – for goal-oriented, automation-friendly load testing
  • Open source, great support and documentation
  • Lightweight uses Javascript
  • Does not run in NodeJS and doesn’t run in a browser


Resources:

https://k6.io/

Load Tests: Jmeter vs Gatling

Hello guys,

Continuing on reviewing some performance test tools, today is the turn of Jmeter and Gatling, which looks like more and more people are using nowadays. Remember always check your other options and see what better fits for your project.


Jmeter is a great and powerful tool, but depending on what you really need (something more lighter) then Jmeter might become an overcomplex, slow, hard to maintain tool.

Jmeter Gatling
In-built Protocols Support
  • HTTP
  • FTP
  • JDBC
  • SOAP
  • LDAP
  • TCP
  • JMS
  • SMTP
  • POP3
  • IMAP
  • HTTP
  • JMS
  • MQTT
Speed to write tests
  • Slow
  • Fast
Support of β€œTest as Code”
  • GUI oriented
  • Possibility to create scripts, but too complex and lack of documentation
  • Weak (Java)
  • Hard to maintain
Ramp-up Flexibility
  • Plugins available to be able to configure flexible load
  • Supports ramp-up phases and flexible load
Test Results Analyzing
  • Yes
  • Yes
Resources Consumption
  • Heavy to run tests with multiple users on a single machine, more memory consumption
  • Lighweight and doesn’t take up so much memory of your machine

Screenshot 2020-06-20 at 14.38.36

Easy to use with Version Control Systems
  • No
  • Yes
Number of Concurrent Users
  • Thousands, under restrictions
  • Thousands
Recording Functionality
  • Yes
  • Yes
Distributed Execution
  • Yes
  • Yes
Load Tests Monitoring
  • Add listeners, but consume more memory
  • Yes, logs through the console and reports are created at the end
Screenshot_2020-06-20 Gatling Stats - Global Information


Jmeter is most used when:

  • You need to perform a complex load including different protocols
  • You can record scenarios
  • Robust support and training ecosystem
  • Require that a full scenario be written for every test
  • If you need to simulate specific load with some custom ramp-up patterns
  • If you just prefer UI desktop app for scripts creation, or you just do not know Javascript/YAML/JSON well enough


Gatling solves some specific problems:


Resources:

gatling.io/

Load Tests: Locust vs Jmeter

Hello guys,

Today I am going to post a comparison of these two different load tests framework. I know most people use Jmeter and it has been longer in the market, but I have recently used Locust and also Artillery (which will post a comparison later) and the results are great, the team was able to improve the creation of the tests and also the maintainability.

In the end of the day you need to use the right tool for your needs, Jmeter is a great and powerful tool, but depending on what you really need (something more lighter) then Jmeter might become an overcomplex, slow, hard to maintain tool.

Jmeter Locust
In-built Protocols Support
  • HTTP
  • FTP
  • JDBC
  • SOAP
  • LDAP
  • TCP
  • JMS
  • SMTP
  • POP3
  • IMAP
  • HTTP, but ability to add a customise protocol
Speed to write tests
  • Slow
  • Fast
Support of β€œTest as Code”
  • GUI oriented
  • Possibility to create scripts, but too complex and lack of documentation
  • Weak (Java)
  • Hard to maintain
  • Scripts oriented
  • Strong (Python)
  • Easier to maintain
Ramp-up Flexibility
  • Plugins available to be able to configure flexible load
  • Ability to specify a linear load only (so no complex scenarios)
Test Results Analyzing
  • Yes
  • Yes
Resources Consumption
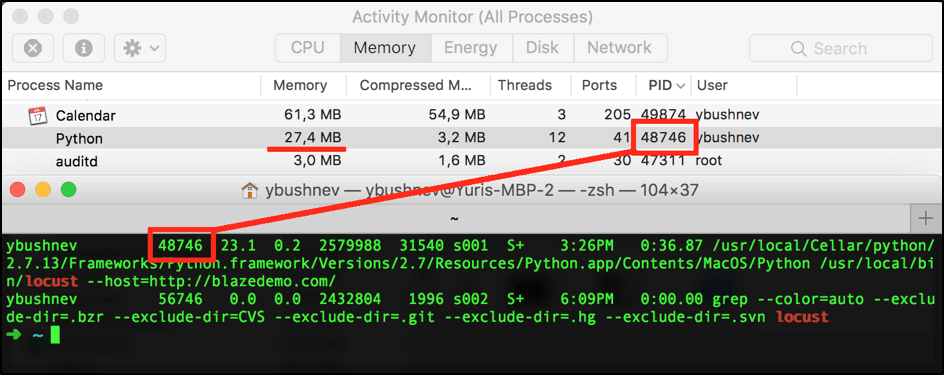
  • Heavy to run tests with multiple users on a single machine, more memory consumption
  • Light to run tests with multiple users on a single machine, less memory consumption
  • Doesn’t take up so many of your machines’ resources.
Easy to use with Version Control Systems
  • No
  • Yes
Number of Concurrent Users
  • Thousands, under restrictions
  • Thousands
Recording Functionality
  • Yes
  • No
Distributed Execution
  • Yes
  • Yes
Load Tests Monitoring
  • Add listeners, but consume more memory
  • Ability to monitor a basic load


Jmeter is most used when:

  • You need to perform a complex load including different protocols
  • If you need the script recording functionality
  • If you need to simulate specific load with some custom ramp-up patterns
  • If you just prefer UI desktop app for scripts creation, or you just do not know Python well enough


Locust solves some specific problems:

  • You can write performance scripts pretty fast
  • Push to your VCS and easily maintain the scripts
  • Spend minimum time on maintenance without additional GUI applications
  • Simulate thousands of test users on local machine without the need to have multiple slaves


Reducing the Scope of Load Tests with Machine Learning

Hello hello,

Today I am going to share this really interesting webinar of my friend Julio de Lima, he is one of the top QA influencers in Brazil, and in this video he is talking about how to reduce the scope of load tests using Machine Learning.

Load testing execution produces a huge amount of data. Investigation and analysis are time-consuming, and numbers tend to hide important information about issues and trends. Using machine learning is a good way to solve data issues by giving meaningful insights about what happened during test execution.

Julio de Lima will show you how to use K-means clustering, a machine learning algorithm, to reduce almost 300,000 records to fewer than 1,000 and still get good insights into load testing results. He will explain K-means clustering, detail what use cases and applications this method can be used in, and give the steps to help you reproduce a K-means clustering experiment in your own projects. You’ll learn how to use this machine learning algorithm to reduce the scope of your load testing and getting meaningful analysis from your data faster.


Thank you Julio πŸ™‚

Performance Tests with Artillery

Hello guys, after a long break I am posting about a previous project where I created some performance tests to check the reliability of the server. Artillery is a npm library that helps you with load tests, is very simple to use and the scripts are written in .yml, so make sure the indentation is right.

So in the load-tests.yml file you will find this script:

  config:
    target: 'https://YOUR-HOST-HERE' //Here you need add your host url
    processor: "helpers/pre-request.js" //This is the pre-request function we are using to create the data
    timeout: 3 // What is the timeout for each request, it is going to stop the flow and tag the scenario as a failure
    ensure:
      p95: 1000 // Force artillery to exit with a non-zero code when a condition is not met, useful for CI/CD
    plugins:
      expect: {}
    environments:
      qa:
        target: "https://YOUR-HOST-HERE-QA-ENV" //Here you need add your QA env url
        phases:
          - duration: 600 //Duration of the test, in this case 10 minutes
            arrivalRate: 2 //Create 2 virtual users every second for 10 minutes
            name: "Sustained max load 2/second" //Run performance tests creating 2 users/second for 10 minutes
      dev:
        target: "https://YOUR-HOST-HERE-DEV-ENV" //Here you need add your Dev env url
        phases:
          - duration: 120
            arrivalRate: 0
            rampTo: 10 //Ramp up from 0 to 10 users with constant arrival rate over 2 minutes
  Β  Β  Β  Β  Β  name: "Warm up the application"
          - duration: 3600
            arrivalCount: 10 //Fixed count of 10 arrivals (approximately 1 every 6 seconds):
            name: "Sustained max load 10 every 6 seconds for 1 hour"
    defaults:
      headers:
        content-type: "application/json" //Default headers needed to send the requests
  scenarios:
    - name: "Send User Data"
      flow:
      - function: "generateRandomData" //Function that we are using to create the random data
      - post:
          headers:
            uuid: "{{ uuid }}" //Variable with value set from generateRandomData function
          url: "/PATH-HERE"//Path of your request 
          json:
            name: "{{ name }}"
          expect:
            - statusCode: 200 //Assertions, in this case we are asserting only the status code
      - log: "Sent name: {{ name }} request to /PATH-HERE"
      - think: 30 //Wait 30 seconds before running next request
      - post:
          headers:
            uuid: "{{ uuid }}"
          url: "/PATH-HERE"
          json:
            name: "{{ mobile }}"
          expect:
            - statusCode: 200
- log: "Sent mobile: {{ mobile }} request to /PATH-HERE"


Now, for the function that creates the data you have a Faker library, that you need to install in your package with npm, then you need to export this function. You need to make the variables available using the userContext.vars and remember to always accept the parameters: userContext, events and done, so they can be used in the artillery scripts.

const Faker = require('faker')

module.exports = {
  generateRandomData
}

function generateRandomData (userContext, events, done) {
  userContext.vars.name = `${Faker.name.firstName()} ${Faker.name.lastName()} PerformanceTests`
  userContext.vars.mobile = `+44 0 ${Faker.random.number({min: 1000000, max: 9999999})}`
  userContext.vars.uuid = Faker.random.uuid()
  userContext.vars.email = Faker.internet.email()
  return done()
}


This is just an example, but you can see how powerful and simple artillery is on their website.

You can see the entire project with the endurance and load scripts here: https://github.com/rafaelaazevedo/artilleryExamples

See you guys !