Parallel tests with Maven – Junit

Hello guys,

Today I will post about multithreading with Maven. We have some plugins which are able to do the thread safe in your tests:

  • Surefire offers a variety of options to execute tests in parallel, allowing you to make best use of the hardware at your disposal.
  •  

  • Forking in particular can also help keeping the memory requirements low.


How can you configure the test execution ?

 
One can impose thread-count limitations on suites, classes or methods using one or more of the parameters threadCountSuites, threadCountClasses and threadCountMethods. If only threadCount is specified, Surefire attempts to estimate the thread counts for suites, classes and methods and reuses the threads in favor of a leaf, e.g. parallel methods (possibly increasing concurrent methods).
 
In the next post I will do some tests with junit and testng, so I can talk more about this plugin with each framework, but for now you can see the example pages: JUnit and TestNG.

 
As an example with an unlimited number of threads, there is maximum of three concurrent threads to execute suites: parallel = all, useUnlimitedThreads = true, threadCountSuites = 3. In the second example the thread-counts represent a ratio, e.g. for parallel = all, threadCount = 16, threadCountSuites = 2, threadCountClasses = 3, threadCountMethods = 5. Thus the concurrent suites will be 20%, concurrent classes 30%, and concurrent methods 50%.
 
Finally, the threadCount and useUnlimitedThreads may not be necessarily configured if the equivalent thread-counts are specified for the value in parallel.
 
The parameters parallelTestsTimeoutInSeconds and parallelTestsTimeoutForcedInSeconds are used to specify an optional timeout in parallel execution. If the timeout is elapsed, the plugin prints the summary log with ERROR lines: “These tests were executed in prior to the shutdown operation”, and “These tests are incomplete” if the running Threads were interrupted.
 
The important thing to remember with the parallel option is: the concurrency happens within the same JVM process. That is efficient in terms of memory and execution time, but you may be more vulnerable towards race conditions or other unexpected and hard to reproduce behavior.


Parallel Test Execution and Single Thread Execution

 
As mentioned above the parallel test execution is used with specific thread count. Since of Surefire 2.18, you can apply the JCIP annotation @net.jcip.annotations.NotThreadSafe on the Java class of JUnit test (test class, Suite, Parameterized, etc.) in order to execute it in single Thread instance. The Thread has name “maven-surefire-plugin@NotThreadSafe“.
 
This way the parallel execution of tests classes annotated with @NotThreadSafe are forked in single thread instance (don’t mean forked JVM process).
 
If the Suite or Parameterized is annotated with @NotThreadSafe, the suite classes are executed in single thread. You can also annotate individual test class referenced by Suite, and the other unannotated test classes in the Suite can be subject to run in parallel.

 
Note: As designed by JUnit runners, the static methods annotated with @BeforeClass and @AfterClass are called in parent thread. Assign classes to the @NotThreadSafe Suite to prevent from this trouble.


Forked Test Execution


The parameter forkCount defines the maximum number of JVM processes that Surefire will spawn concurrently to execute the tests. It supports the same syntax as -T in maven-core: if you terminate the value with a ‘C’, that value will be multiplied with the number of available CPU cores in your system. For example forkCount=2.5C on a Quad-Core system will result in forking up to ten concurrent JVM processes that execute tests.

 
The parameter reuseForks: to reuse the processes to execute the next tests (reuseForks=true/false). The default setting is forkCount=1/reuseForks=true, which means that Surefire creates one new JVM process to execute all tests in one maven module. forkCount=1/reuseForks=false executes each test class in its own JVM process, one after another. You can use the place holder ${surefire.forkNumber} within argLine, or within the system properties (both those specified via mvn test -D... and via systemPropertyVariables).

 
The following is an example configuration that makes use of up to three forked processes that execute the tests and then terminate. A system property databaseSchema is passed to the processes, that shall specify the database schema to use during the tests. The values for that will be MY_TEST_SCHEMA_1, MY_TEST_SCHEMA_2, and MY_TEST_SCHEMA_3 for the three processes.
 
<plugins>
[...]
  <plugin>
    <groupId>org.apache.maven.plugins</groupId>
    <artifactId>maven-surefire-plugin</artifactId>
    <version>2.18.1</version>
    <configuration>
        <forkCount>3</forkCount>
        <reuseForks>true</reuseForks>
        <argLine>-Xmx1024m -XX:MaxPermSize=256m</argLine>
        <systemPropertyVariables>
            <databaseSchema>MY_TEST_SCHEMA_${surefire.forkNumber}</databaseSchema>
        </systemPropertyVariables>
    </configuration>
  </plugin>
[...]
</plugins>


In case of a multi module project with tests in different modules, you could also use, say, mvn -T 2 ... to start the build, yielding values for ${surefire.forkNumber} ranging from 1 to 6.
 
By setting reuseForks=true, you can reuse the same context for consecutive tests. And as many tests tend to use and access the same test data, you can avoid database locks during the concurrent execution by using distinct but uniform database schemas.
 
As reuseForks=false creates a new JVM process for each test class, using parallel=classes would have no effect. You can still useparallel=methods, though.
 
When using reuseForks=true and a forkCount value larger than one, test classes are handed over to the forked process one-by-one. Thus, parallel=classes would not change anything. However, you can use parallel=methods: classes are executed in forkCountconcurrent processes, each of the processes can then use threadCount threads to execute the methods of one class in parallel.


Examples:

 
In your pom.xml file:

Add ths surefire plugin.

<plugins>
[...]
  <plugin>
    <groupId>org.apache.maven.plugins</groupId>
    <artifactId>maven-surefire-plugin</artifactId>
    <version>2.18.1</version>
    <dependencies>
      <dependency>
        <groupId>org.apache.maven.surefire</groupId>
        <artifactId>surefire-junit47</artifactId>
        <version>2.18.1</version>
      </dependency>
    </dependencies>
  </plugin>
[...]
</plugins>


After, you must set the parallel parameter, and may change thethreadCount or useUnlimitedThreads attribute.
 

<plugins>
    [...]
      <plugin>
        <groupId>org.apache.maven.plugins</groupId>
        <artifactId>maven-surefire-plugin</artifactId>
        <version>2.18.1</version>
        <configuration>
          <parallel>methods</parallel>
          <threadCount>10</threadCount>
        </configuration>
      </plugin>
    [...]
</plugins>


As of Surefire 2.7, no additional dependencies are needed to use the full set of options with parallel. As of Surefire 2.16, new thread-count attributes are introduced, namely threadCountSuites, threadCountClasses and threadCountMethods. Additionally, the new attributes parallelTestsTimeoutInSeconds and parallelTestsTimeoutForcedInSeconds are used to shut down the parallel execution after an elapsed timeout, and the attribute parallel specifies new values.

Thank you guys ! Hope you can enjoy and search even more about this. I’ve just summarised what I think it’s more important to know about junit, maven and parallel tests 🙂

As always if you have some question, suggestion feel free to comment below. I will reply as soon as possible and if I don’t know I will find someone to help me reply to you. Have an excellent weekend everyone ! See you next week !
 
 
Resources:

https://maven.apache.org/surefire/maven-surefire-plugin/examples/fork-options-and-parallel-execution.html

http://maven.apache.org/surefire/maven-surefire-plugin/examples/junit.html
Pros and Cons of Robotium

Hi guys, I am writing just a summary about Robotium, because maybe I will start to work with it. So, if you have any tips or suggestion, please feel free to comment here.

Robotium is a popular Android automation framework for testing native and hybrid Android apps using the black box method. Licensed under an Apache 2.0 license and first released in 2010.

To use Robotium, you need either the source code or apk file for the app, Eclipse for building a test project, ADT (Android Development Tools), SDK (Software Development Kit), JDK (Java Development Kit), and the Robotium.jar file.

Benefits:
• You can develop powerful test cases, with minimal knowledge of the application under test.
• Allows user to test more flexible and convenient for analyzing results.
• Robotium allows us to take screenshots anywhere in the test (both for Emulator and Device) and save it to device internal memory or SD Card or Emulator
• The framework handles multiple Android activities automatically.
• Minimal time needed to write solid test cases.
• Readability of test cases is greatly improved, compared to standard instrumentation tests.
• Test cases are more robust due to the run-time binding to GUI components.
• Blazing fast test case execution.
• Automatic timing and delays.

Limitations of Robotium:
• Tied to JUnit 3 Instrumentation on device.
• Tied to one app process.
• It can’t work with different Applications in on test – if your application call another one (like Camera) – Robotium can’t “see” it and press any buttons there.

Parallel tests:

I’ve found this API: https://github.com/square/spoon, but I believe that we can configure parallel tests with Jenkins too.


Thank you guys ! See you next week 🙂


Sources:

https://saucelabs.com/resources/articles/open-source-tools-robotium-android-appium

https://code.google.com/p/robotium/

https://www.linkedin.com/grp/post/3769150-5852687643892002817

http://blog.mobinius.com/robotium-best-testing-framework-for-android/

How to: Take a screenshot with CodedUI and C#

Hi guys,

Last week I was on holidays, for this reason I haven’t posted anything. So, I will continue with VM scripts and what you can do with them next week. Today, I will post a very, very, very old code that I have done when I was building a framework for a desktop application with Coded UI and C#. It is a function to take screenshots in your automation.

I will refactor this code other time, because I know that it is not following all the best practices, but for now you can copy and change where you want.

The code is on my github:

https://github.com/rafaelaazevedo/CodedUI/blob/master/PrintScreen.cs

– First: you can see what are the parameters that you need to send:  (PublicFunctions Values, string _stringMessage, Boolean FULLSCREEN = false, Boolean FAIL = false)

– Second: intFail is a failure counter and stringPath is a variable that you need to update with the path where will be placed your screenshot

– Third: Thread.Sleep(2000) you can remove this and put something like wait for, it is not the best solution use Thread.Sleep

– Fourth: This part will take the FULLSCREEN or not, depending what you have sent

– Fifth: This part is just formatting the date/time.

– Sixth: Now it is saving the picture with the path and the date/time. It is missing a try/catch here, please don’t forget to put in your code xD

– Seventh: It is clearing the clipboard for the next screenshot

– Eighth: It is counting the failure and catching the failure message

– Ninth: The last step is inserting the failure into the database with all the information that you are passing

Thank you guys ! See you next week 🙂

Second script with Velocity (VM)

Hi guys, Today I will post another example of VM template, sorry for not to post something new, but I’ve got flu this week, I am feeling like a zombie 😦

This example is more complete and I have tested, so it is working 😀 I just made some changes to print the result with the values and the template. We have get and set methods, the vm template in html and the class to set the values and merge the template.

– Create the get and set customer class:

package test;
public class Customer {

    String customerNumber;
    String name;
    String address;
    String city;
    String state;
    String zip;
    String phone;

    public String getCustomerNumber() {return customerNumber;}
    public void setCustomerNumber(String s) {customerNumber = s;}
    public String getName() {return name;}
    public void setName(String s) {name = s;}
    public String getAddress() {return address;}
    public void setAddress(String s) {address = s;}
    public String getCity() {return city;}
    public void setCity(String s) {city = s;}
    public String getState() {return state;}
    public void setState(String s) {state = s;}
    public String getZip() {return zip;}
    public void setZip(String s) {zip = s;}
    public String getPhone() {return phone;}
    public void setPhone(String s) {phone = s;}
}

– Create a customer search class which will set the values and merge with the template:

package test;
import org.apache.velocity.Template;
import java.io.StringWriter;
import org.apache.velocity.app.Velocity;
import org.apache.velocity.VelocityContext;
import test.Customer;

public class CustomerSearch  {
    
    public static void main(String[] args) throws Exception { 

     CustomerSearch cs = new CustomerSearch(); 

     StringWriter writer = cs.getTemplate(); 
     System.out.println(writer.toString());
    }
    public StringWriter getTemplate()  {

        Template template = null;
        StringWriter writer = new StringWriter();
        Customer customer = getCustomer();
        
        VelocityContext context = new VelocityContext();
        try  {
            context.put("customer", customer);
            template = Velocity.getTemplate("src/customer.vm");
            template.merge(context, writer); 
        }  catch( Exception e )  {
          System.err.println("Exception caught: " + e.getMessage());
        }

        return writer;
    }

    private Customer getCustomer()  {
        Customer customer = new Customer();
        customer.setCustomerNumber("ABC123");
        customer.setName("Joe JavaRanch");
        customer.setAddress("123 Rancho Javo");
        customer.setCity("Bueno Ranch");
        customer.setState("CO");
        customer.setZip("63121");
        customer.setPhone("303-555-1212");
        return customer;
    }
}

– After, create the vm template html:

<html>
<head><title>Customer Search Results - $customer.customerNumber</title></head>
<body bgcolor="#faf7f1">
    <h1>Customer information for customer number $customer.customerNumber</h1>
    <b>Name:</b> $customer.name<br>
    <b>Address:</b> $customer.address<br>
    <b>City:</b> $customer.city<br>
    <b>State:</b> $customer.state<br>
    <b>Zip:</b> $customer.zip<br>
    <b>Phone:</b> $customer.phone<br>
</body>
<html>

Cheers guys !

Source:

http://velocity.apache.org/engine/devel/developer-guide.html

https://velocity.apache.org/engine/releases/velocity-1.5/webapps.html

http://www.javaranch.com/journal/2004/03/Velocity-AnIntroduction.html

http://www.javaworld.com/article/2075966/core-java/start-up-the-velocity-template-engine.html

First script with Velocity (VM)

Velocity is a Java-based template engine. It permits web page designers to reference methods defined in Java code. Basically, you can create files (HTML, XML, etc…) writing scripts and generate them following a template.


– Create Maven Project.

– Add dependency in your pom file – Change the version of the lib:

<dependency>

  <groupId>org.apache.velocity</groupId>

  <artifactId>velocity</artifactId>

  <version>1.6.4</version>

</dependency>


– Create a Vm template, like this one. Save as .vm (I created outside the package test). So, place your template in Project > src > customer.vm and not with the code which the structure is: Project > src > package.test:

Hello $word! This is your first Velocity script !


– Create a Java Class called CreateScript:
import java.io.StringWriter;

import org.apache.velocity.app.VelocityEngine;
import org.apache.velocity.exception.MethodInvocationException;
import org.apache.velocity.exception.ParseErrorException;
import org.apache.velocity.exception.ResourceNotFoundException;
import org.apache.velocity.Template;
import org.apache.velocity.VelocityContext;

public class createXml {
   public static void main(String[] args) throws Exception {
   VelocityEngine ve = new VelocityEngine();
   ve.init();

   try {
    Template t = ve.getTemplate("src/helloworld.vm");

    VelocityContext context = new VelocityContext();
    context.put("word", "World");
    StringWriter writer = new StringWriter();
    t.merge(context, writer);
    System.out.println(writer.toString());
    } catch (ResourceNotFoundException rnfe) {
      System.out.println("Couldn't find the template");
    } catch (ParseErrorException pee) {
      System.out.println("syntax error: problem parsing the template");
    } catch (MethodInvocationException mie) {
      System.out.println("something invoked in the template");
      System.out.println("threw an exception");
    } catch (Exception e) {
    }
  }
}

– Vm file is the template, you will create the template and what the variables that will have the value that you want.

– Inside Java Class:

You need initialize the Velocity API – Write the path of the vm template – Initialize the context and write all the variables and the values (name – variable, word – value) – Initialize the Writer which will render the template – Merge the context and the values creating the template – Show the result

– To run the project, first I had to compil with maven test and after this I just choose Run As – Java Application.

So, this is the first script, I will write more about, but between this you can have a look on the links below. See you guys 🙂


Sources:

http://velocity.apache.org/engine/devel/developer-guide.html

https://velocity.apache.org/engine/releases/velocity-1.5/webapps.html

http://www.javaranch.com/journal/2004/03/Velocity-AnIntroduction.html

http://www.javaworld.com/article/2075966/core-java/start-up-the-velocity-template-engine.html

Configure Thucydides (Report for JBehave) – BDD

What is ?

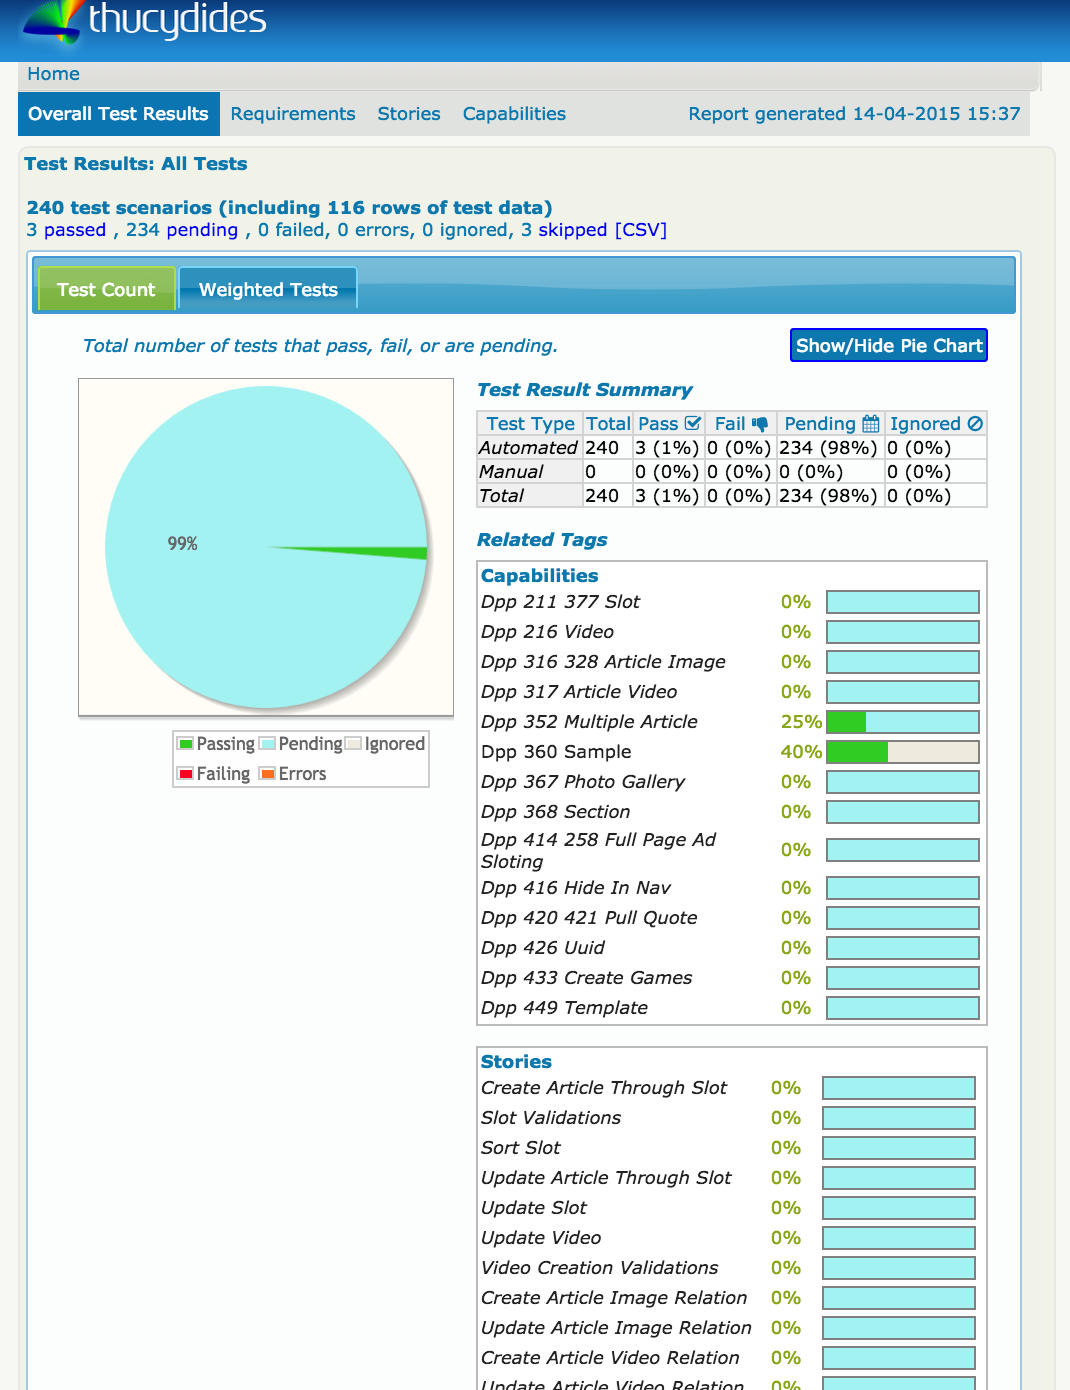
Basically, this report of your scenarios/features:

Screen Shot 2015-06-17 at 12.34.50


Project Structure

+ src
   + main
      + java
         + com.mycompany.pages
            - HomePage.java   

   + test
      + java
         + com.mycompany.pages
            + requirements
               - Application.java
            + steps
               - EndUserSteps.java
            - SearchByKeywordStoryTest.java 

      + stories
         + com.wakaleo.webtests.wikipedia
            - SearchingForCats.story


Starting

If you have maven installed, go to the terminal or IDE and:

– Create a new project:

mvn archetype:generate -Dfilter=thucydides

– Open your settings.xml and write:

<?xml version="1.0" encoding="UTF-8"?>
<settings>
   <pluginGroups>
       <pluginGroup>net.thucydides.maven.plugins</pluginGroup>
  </pluginGroups>
</settings>

– In the pom.xml file, update the default JUnit dependency to at least 4.11

– Add a dependency to hamcrest-all and thucydides-junit. Thucydides uses SLF4J for its logging, so add an SLF4J implementation (e.g. slf4j-simple) as well.

– If you are not using Maven 3, make sure you configure the Maven compiler plugin to use Java 5.

– Finally, add the thucydides-maven-plugin, which provides the Thucydides reporting services. The resulting pom.xml file should look something like this:


  <groupId>com.wakaleo.webtests.wikipedia</groupId>
  <artifactId>wikipediawebtests</artifactId>
  <version>1.0-SNAPSHOT</version>
  <packaging>jar</packaging>

  <name>wikipediawebtests</name>
  <url>http://maven.apache.org</url>

    <properties>
        <project.build.sourceEncoding>UTF-8</project.build.sourceEncoding>
        <thucydides.version>0.9.228</thucydides.version>
    </properties>

    <dependencies>
        <dependency>
            <groupId>junit</groupId>
            <artifactId>junit</artifactId>
            <version>4.11</version>
        </dependency>
        <dependency>
            <groupId>org.hamcrest</groupId>
            <artifactId>hamcrest-all</artifactId>
            <version>1.1</version>
        </dependency>
        <dependency>
            <groupId>net.thucydides</groupId>
            <artifactId>thucydides-junit</artifactId>
            <version>${thucydides.version}</version>
        </dependency>
        <dependency>
            <groupId>org.slf4j</groupId>
            <artifactId>slf4j-simple</artifactId>
            <version>1.6.1</version>
            <type>pom</type>
        </dependency>
    </dependencies>
    <build>
        <plugins>
            <plugin>
                <groupId>org.apache.maven.plugins</groupId>
                <artifactId>maven-compiler-plugin</artifactId>
                <version>2.3.2</version>
                <configuration>
                    <source>1.5</source>
                    <target>1.5</target>
                </configuration>
            </plugin>
            <plugin>
                <groupId>net.thucydides.maven.plugins</groupId>
                <artifactId>maven-thucydides-plugin</artifactId>
                <version>${thucydides.version}</version>
            </plugin>
        </plugins>
    </build>
</project>                      


– Run this command to be sure that everything it is running correctly: mvn package

– Create a new class contains the list of “features” that make up the application, and stories related to each feature. These stories are not the tests themselves – rather they are used to model the application requirements.

– Writing your first test:

public class Application {
	    @Feature
	    public class Search {
	        public class SearchByKeyword {}
	        public class SearchByAnimalRelatedKeyword {}
	        public class SearchByFoodRelatedKeyword {}
	        public class SearchByMultipleKeywords {}
	        public class SearchForQuote{}
	    }

	    @Feature
	    public class Backend {
	        public class ProcessSales {}
	        public class ProcessSubscriptions {}
	    }

	    @Feature
	    public class Contribute {
	        public class AddNewArticle {}
	        public class EditExistingArticle {}
	    }
	}


– Create a new test class in a package of your choice calledSearchByKeywordStoryTest.java

@Story(SearchBySingleKeyword.class)
@RunWith(ThucydidesRunner.class)
public class SearchByKeywordStoryTest {

    @Managed(uniqueSession = true)
    public WebDriver webdriver;

    @ManagedPages(defaultUrl = "http://www.wikipedia.com")
    public Pages pages;

    @Steps
    public EndUserSteps endUser;

    @Test
    public void should_display_article_about_cats() {
        endUser.is_on_the_wikipedia_home_page();
        endUser.searches_by_keyword("cats");
        endUser.should_see_article_with_title("Cat - Wikipedia, the free
 encyclopedia");


PS: @Managed and  @ManagedPages are required to take care of our page objects.


– Create a step library called EndUserSteps:

public class EndUserSteps extends ScenarioSteps {

    public EndUserSteps(Pages pages) {
	super(pages);
    }

    @Step
    public void searches_by_keyword(String keyword) {
        enters(keyword);
        performs_search();
    }

    @Step
    public void enters(String keyword) {
    }

    @Step
    public void performs_search() {
    }

    @Step
    public void should_see_article_with_title(String title) {
    }

    @Step
    public void is_on_the_wikipedia_home_page() {
    }
}


– You will need create your own classes inside of each Step.

– Run the command to generate your report: mvn verify thucydides:aggregate

– Your report will be in target/thucydides directory, open the home.html


If you want to see a complete model, go to this link.

If you want to learn more about maven commands, go to this link.

If you want to see the post of John Smart with his complete example, go to this link.


Thank you guys  🙂


Sources:

https://github.com/thucydides-webtests/thucydides/wiki/Getting-Started

https://weblogs.java.net/blog/johnsmart/archive/2011/10/31/getting-started-thucydides-%E2%80%93-using-thucydides-maven-archetypes

http://stackoverflow.com/questions/23297718/thucydides-install-from-scratch-archetype-all-tests-are-skipped

http://maven.apache.org/guides/introduction/introduction-to-the-lifecycle.html

https://github.com/thucydides-webtests/thucydides-demos

Getting Started with Mobile Test Automation & Appium

Hi guys, today I have another Webinar that I participate about Appium, how to choose the automation mobile tool, how should be the structure, etc. You can watch online or download, just click in this link to start.

You can jump the advertisement moving to 00:10:51 of the video. Also, you can jump to 00:23:12 and watch the demo. To jump the demo go to 00:40:00.


Difference between hybrid native and html


Screen Shot 2015-05-27 at 20.39.45


– HTML: web applications which runs in web browser.

– Native: just native elements, apps which doesn’t have html elements.

– Hybrid: mix of native elements and html elements.


Mobile QA Solutions


Screen Shot 2015-05-27 at 20.44.35

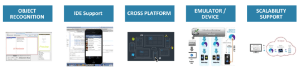
– How choose the automation tool ?

– Verify how you inspect the elements.

– Scalability, How many devices supports (IOS, windows phone, tablet, kindle, ipad, etc).

– Integration with other tools like Jenkins, JIRA, etc.

– Cloud, If this tool supports cloud tests (Amazon cloud, Sauce Labs, etc).

– Automation Support, How long do you take to find the solution for some problem ? (Particularly, this is the most important for me )


Appium

Open source automation test automation framework for native, hybrid and mobile apps.


Supports:
Real devices, Simulators, Native Apps, Hybrid Apps, Mobile Web Apps (IOS and Android only).

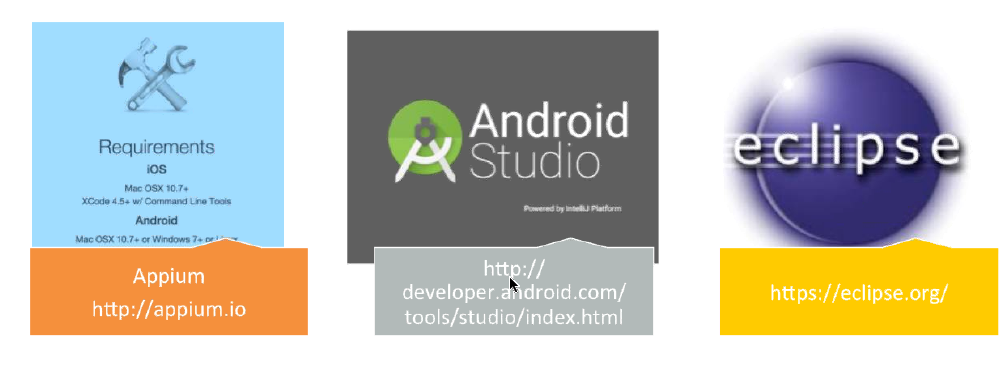
Environment: Appium, Android Studio (Sdks) and Eclipse.

Screen Shot 2015-05-27 at 20.47.56

Setting parameters: App device, launch device, android setting (path of sdks).


Screen Shot 2015-05-27 at 20.49.03

Architecture, Blueprint: 

Screen Shot 2015-05-27 at 20.46.16

Screen Shot 2015-05-27 at 20.50.50

Make sure that you are doing right


Screen Shot 2015-05-27 at 21.14.19

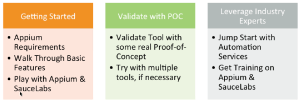
– Do some proof of concepts (The configuration it is the hard and most boring part for me).

– Share the right quantity of tests between emulators and devices.

– Distribute the right level of tests between unit (70%), integration (20%) and manual tests (10%).

– Remember that if you are using BDD, it is just 3 layers.

– Use CI since the beginning.

– Decide what must to have in the report.

– Considerate the language which the developers are using (You never know when you will need help).

Screen Shot 2015-05-27 at 21.18.30

Thank you guys ! See you next week 🙂

Source: link

Code example to catch url, Status code and time to load an url

Hi guys, today I will post a simple project that I did just to catch some information with Selenium and Java. So, I have a spreadsheet with some urls in the first column and when I run the project, it is being recorded the status code of the urls and how long is lasting to load this page in the following columns.

It is very simples. I know that there are many ways to do that and you don’t need to use selenium because will take more time to render the page and everything, but maybe someone is needing something similar. So, now the code and in the bottom the link to my project.

  • OPEN URL – Open the URL and write the StatusCode and the time to load the page in the following columns:
import jxl.read.biff.BiffException;
import org.openqa.selenium.WebDriver;
import java.io.File;
import java.io.FileInputStream;
import java.io.FileOutputStream;
import java.io.FileWriter;
import org.apache.poi.hssf.usermodel.HSSFWorkbook;
import org.apache.poi.ss.usermodel.Workbook;
import org.openqa.selenium.By;

public class OpenUrl {

    OpenDataBase opendatabase = new OpenDataBase();
    FileOutputStream fOut = null;

    public void OpenURL(WebDriver driver) throws BiffException, Exception {
        String tablename = ("tb");
        opendatabase.Open(tablename);
        File file = new File("BD.xls");
        int result = 0;
        String STR = "CRI -";
        int ARQ = 1;
        int WARNING = 2;
        int CRITICAL = 3;

        Workbook wb = new HSSFWorkbook(new FileInputStream(file.
getCanonicalPath()));

        for (int i = 0; i < opendatabase.sheet.getRows(); i++) {

            String url = opendatabase.sheet.getCell(0, i).getContents();

            double start = System.currentTimeMillis();
            driver.manage().window().maximize();
            driver.get(url);
            double finish = System.currentTimeMillis();
            double totalTime = finish - start;
            double totalTimeSec = totalTime / 1000;

            try {
                driver.findElement(By.xpath("/html/body/div/span[2]/ul/li/a")
).click();
            } catch (Exception e) {
                driver.findElement(By.xpath("/html/body/div/span/ul/li/a")
).click();
            }

            String titlepage = driver.getTitle().replace(" ", "");

            FileWriter fw = new FileWriter(titlepage + ".txt");
            int statusCode = Statuscode(driver.getCurrentUrl(), driver);
            String line = url + "," + totalTimeSec + "," + statusCode;

            fw.write(line);
            fw.close();


        }


    }

    public int Statuscode(String URLName, WebDriver driver) {
        try {
            int statuscode = Integer.parseInt(driver.findElement(By.xpath
("/html/body/div/span/span/pre[2]")).getText().substring(9, 12));
            return statuscode;
        } catch (Exception e) {
            e.printStackTrace();
            return 1;
        }
    }
}
  • OPEN DATABASE CODE – Read the columns in the Excel Spreadsheet:
import java.io.File;
import java.io.IOException;
import jxl.Sheet;
import jxl.Workbook;
import jxl.WorkbookSettings;
import jxl.read.biff.BiffException;

public class OpenDataBase{

    Sheet sheet;
    Workbook bdurl;
      
    public Sheet Open(String tablename) throws BiffException, IOException, 
Exception { 

        File file = new File("BD.xls");
            WorkbookSettings ws = new WorkbookSettings();
            ws.setEncoding("Cp1252");
            
            bdurl = Workbook.getWorkbook(new File(file.getCanonicalPath()), 
ws);             
            
            sheet = bdurl.getSheet(tablename);
            return sheet;
        }

    public void Close(Workbook bdurl) throws BiffException, IOException, 
Exception {

        bdurl.close();
    }
}


  • MAIN CLASS – statusCode:
import org.openqa.selenium.WebDriver;
import org.openqa.selenium.firefox.FirefoxDriver;
import org.openqa.selenium.firefox.FirefoxProfile;
import java.util.concurrent.TimeUnit;
import org.openqa.selenium.firefox.internal.ProfilesIni;
import org.openqa.selenium.remote.CapabilityType;
import org.openqa.selenium.remote.DesiredCapabilities;

public class statusCode {

    public static void main(String[] args) throws Exception {
        ProfilesIni profilesIni = new ProfilesIni();
        FirefoxProfile profile = profilesIni.getProfile("default");
        WebDriver driver = new FirefoxDriver(profile);

        DesiredCapabilities capabilities = new DesiredCapabilities();
        capabilities.setCapability(CapabilityType.ACCEPT_SSL_CERTS, true);
        
        profile.setPreference("browser.ssl_override_behavior", 1);
        profile.setPreference("network.proxy.type", 0);
        profile.setAcceptUntrustedCertificates(true);
        profile.setAssumeUntrustedCertificateIssuer(false);

        driver.manage().timeouts().implicitlyWait(5, TimeUnit.SECONDS);

        OpenUrl Openurl = new OpenUrl();
        Openurl.OpenURL(driver);
        
        driver.close();
        driver.quit();
    }
}

Thanks guys ! See you next week, if you have any questions, suggestion please feel free to comment below.

Source: https://github.com/rafaelaazevedo/statuscode_nfe

Webinar: Best Practices for Mobile CI – Sauce Labs

Hey guys, today I will post a webinar that I joined last week about Mobile CI.

It is very interesting, so you will see briefly when you need to use, why, how it works, etc. It lasts 43 minutes so, make sure that you have time to watch. Jump to 00:27:35 to watch the demo of Sauce Labs.

To download or watch you need follow the instructions in the link below:

https://saucelabsreview.webex.com/saucelabsreview/lsr.php?RCID=06e87f252b274b37b4500335b35ef868


What is CI for mobile ?

Screen Shot 2015-05-28 at 10.45.39

Automatically – every commit

How does it works?

Screen Shot 2015-05-28 at 10.46.57

Why ?

– Reduce the need for human-based testing (Save money and time)

– Faster Feedback

– Automate Everything (Very optimistic point of view)

– No touch configuration

– Automated OTA Distribution

– Code Validation: Automated Builds and Tests


How choose the right process ?

Screen Shot 2015-05-28 at 10.53.00


Depend the size of the

company.


Mobile is harder

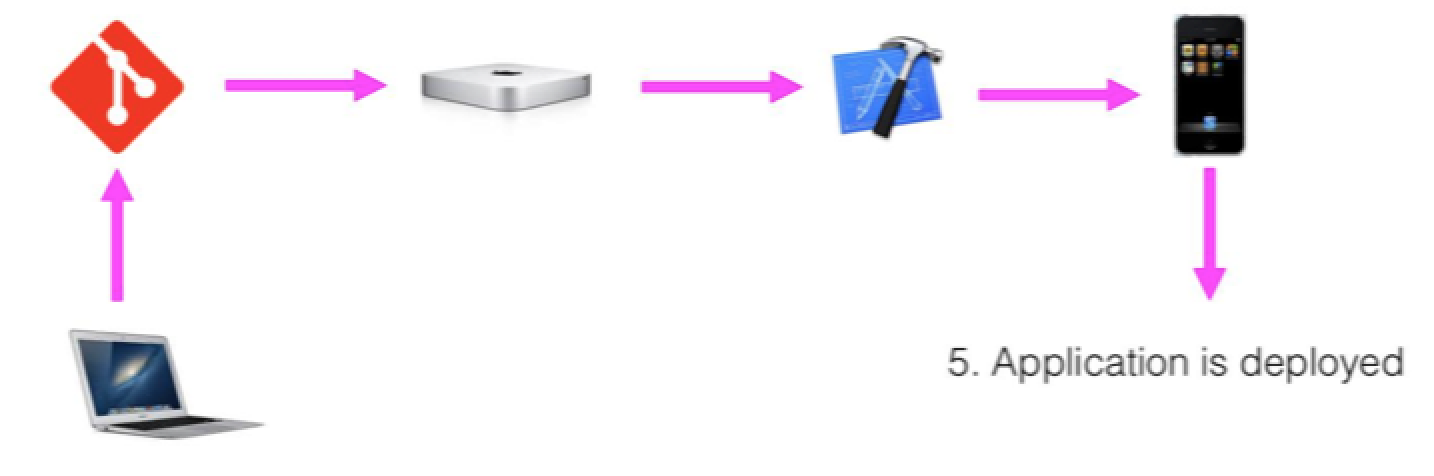
– Infrastructure (If you are building in iOS – You will need XCode, a MacMini, etc.)

– Compilation/Code Signing (You have to configure your build machine, so you will need your key store file, mobile provisioning…)

– Testing (What is the right time to use, challenge to choose what is the better for the project- real devices, simulators…)

– Deployment


Simulators x Emulators x Devices

Simulators

– Used by iOS, included w/ XCode

– Execute i386 instruction set, not ARM

– Upside: Very fast compared to Emulators

– Downside : You don’t have access hardware functions (GPS,Bluetooth Radio, Accelerometers,etc)

Emulators

– Used by Android, included with Android sdks

– Execute ARM (or native device instruction set)

– Upside: You can find free tools

– Downside: Very slow compared to Simulators

– Do not have access to certain hardware functions (GPS, Bluetooth Radio, Accelerometers, etc)

Devices

– Upside: Reproduces the actual performance experienced by your users

– Upside: The only way to catch manufacturer/OEM bugs

– Downside: Very expensive to configure and maintain compared

– Upside: Full access to hardware functions (GPS, Bluetooth Radio, Accelerometers, etc)


When to use devices vs simulators/emulators ?

– Emulators and Simulators are an excellent solution for running automated tests during development. They are inexpensive and will reliably catch most problems.

– Physical Devices can be used on a lower frequency (i.e. pre-release, weekly, daily, etc.). They are the only way to catch performance problems, test certain hardware features and find OEM issues. In the least, devices should be used before every release.


Unit Testing

– 77% of developers said app quality is “very important or mission critical”

– 80% of mobile developers test their apps manually

– Only 13% of mobile developers use automated testing


Unit vs Functional

– Unit: Testing small pieces of code

– Functional: Testing button clicks and UI interaction

Benefits:

– Instant Gratification !

– Repeatable

– Can automatically test every commit

Challenges:

– Unit Tests are not users

– Lot of work to write and maintain them

Which framework to use ?

– You need to remember:

– What is the language/framework do your developers know

– Open Source/Community Support

– 3rd party framework requirements


CI Tools/Services for mobile

– Jenkins:

Open Source, Lots of plugins, iOS and Android 

 Self-Hosted, DYI solution (Setup all the environment, it isn’t easy this part)

– Travis CI:

Hosted Solution, OS X support, lots of plugins, iOS and Android 

Tedious setup process

– Ship.io:

Hosted solution, Designed specifically for mobile, Easy setup, iOS and Android 

Less flexible than other solutions

– Xcode CI:

Integrated w/ Xcode, Apple-Supported

Self-hosted, iOS Only

Thank you guys, thank you Sauce Labs ! Hope you like it !

Automated Testing of REST Services

Hello guys, I have been busy these days, for this reason I am a little late.

In my new project I have been working with web-services and I think this could be useful if you want to do automated tests of Rest Services. I summarise the post, because I don’t agree 100 % with this guy. He says that if you are testing the web service you don’t need to test the client, but the behaviours are different, so you still need test the clients, not the data but the behaviour.

Integration tests were more complex task at that time because such tests imply usage of some mock frameworks. Since an API is consumed by different clients (smartphones, desktops…), make sense to gather a group of tests which check a common logic for all types of clients and to highlight the client-specific test scenarios to focus on a client specific logic. The logic works with data which was already tested in API layer. Such approach gives us an amazing testing strategy. We just need to pay all attention to a UI and some specific features instead in different clients: mobile, web, etc. BUT we still need test different clients, the difference is: We don’t need to test the data, just the behaviour of the client 🙂


Automated Testing of REST-services

In my experience I have been testing REST-services manual and automated. The framework that we are using here is Abdera to generate the xml and HTTP Client to post the xml on the server. But this guy is using REST-assured library . It is very easy to use and it works well with the most popular java testing frameworks such as TestNG, JUnit and Hamcrest.

@Test
 public void getLandLaordTest() {
 given()
 .contentType(ContentType.JSON)
 .pathParam("id", "DoYlvMXN")
 .when()
 .get("/landlords/{id}")
 .then()
 .statusCode(200)
 .body("firstName", equalTo("Sam"))
 .body("trusted", equalTo(false));
 }


Ok, guys it is this, see you next week !

Source: http://java.dzone.com/articles/automated-testing-rest?mz=62823-enterprise-integration